This catch all option is great for all the loose items that take up space on your workbench. With this PVC catch all, you’ll be able to keep your workbench clear but everything you need will be in reach when you need it.
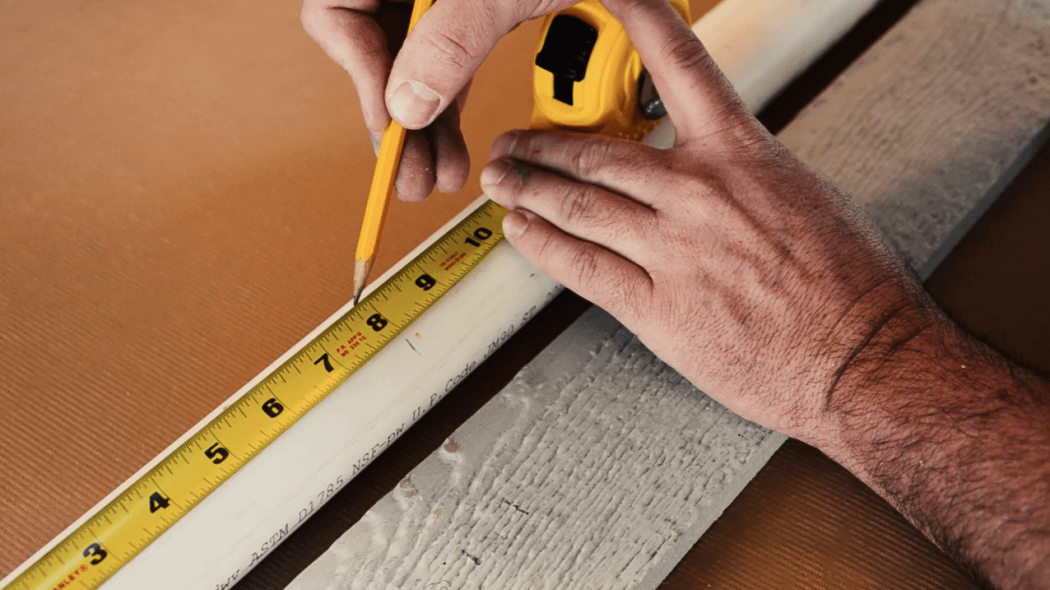
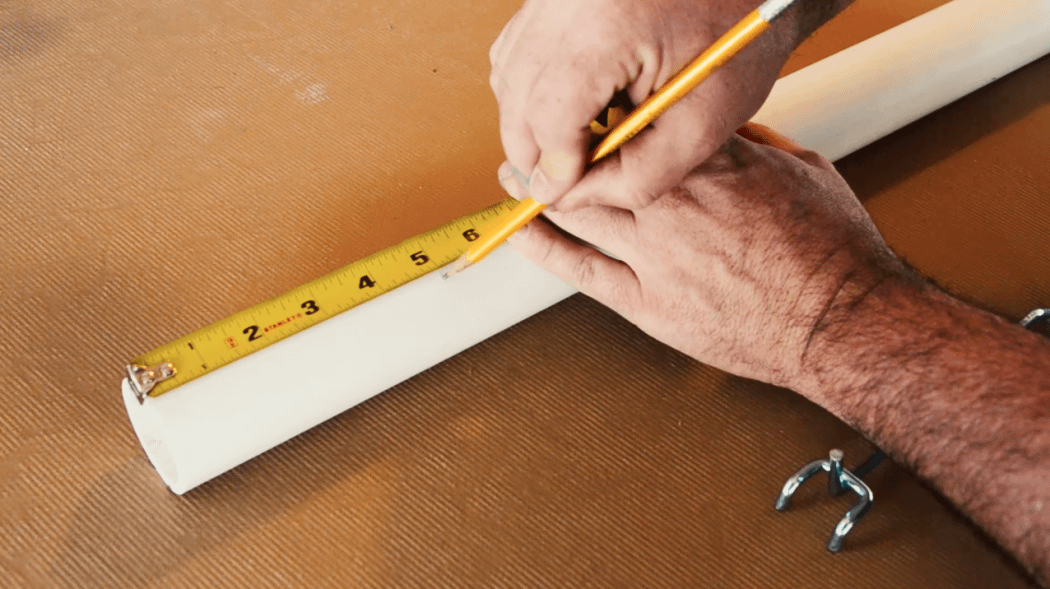
Start by measuring your PVC and determining the length of the organizers.
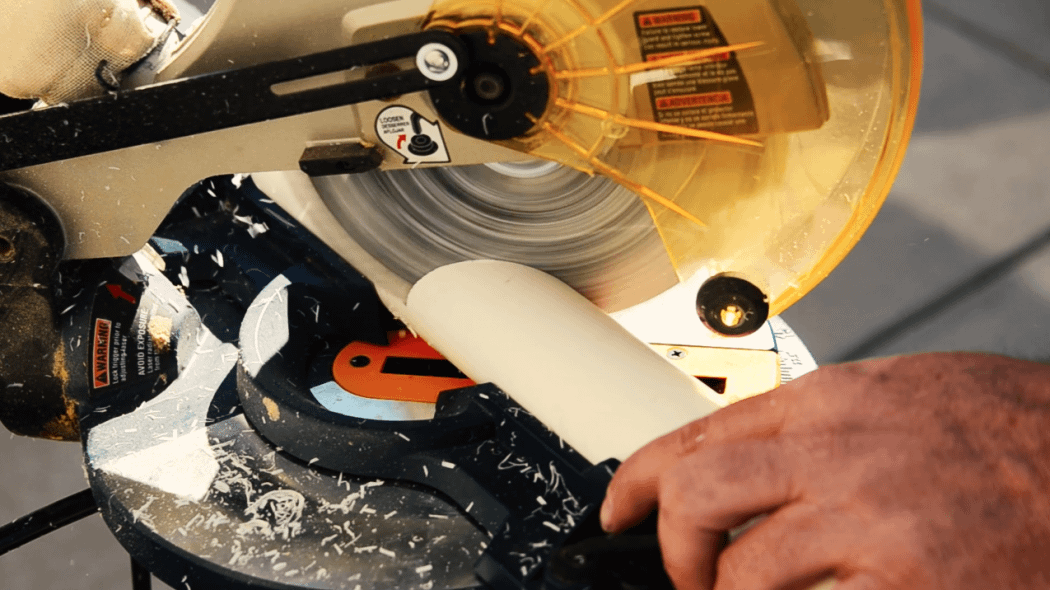
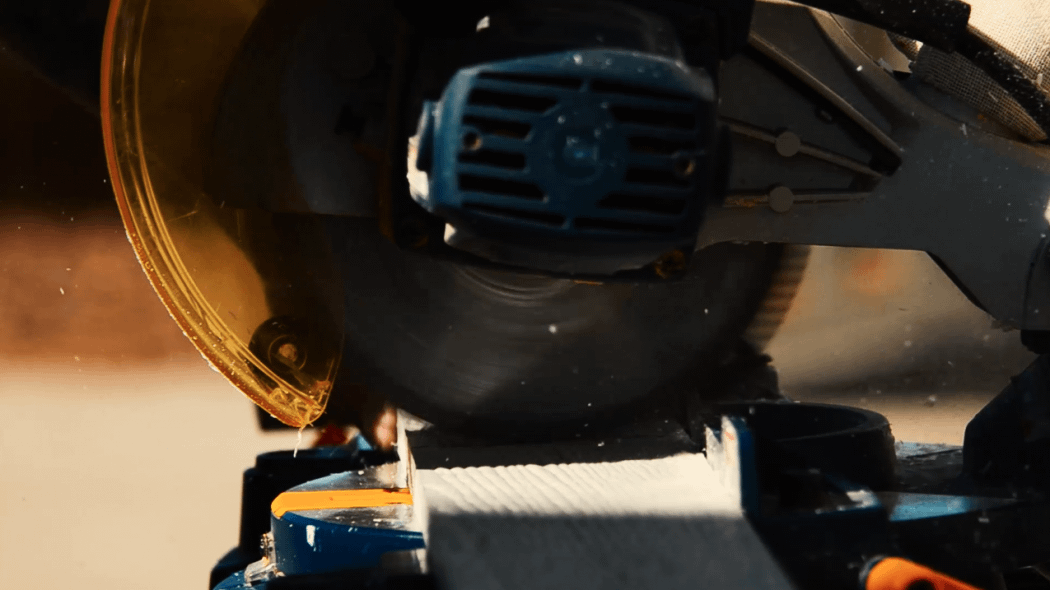
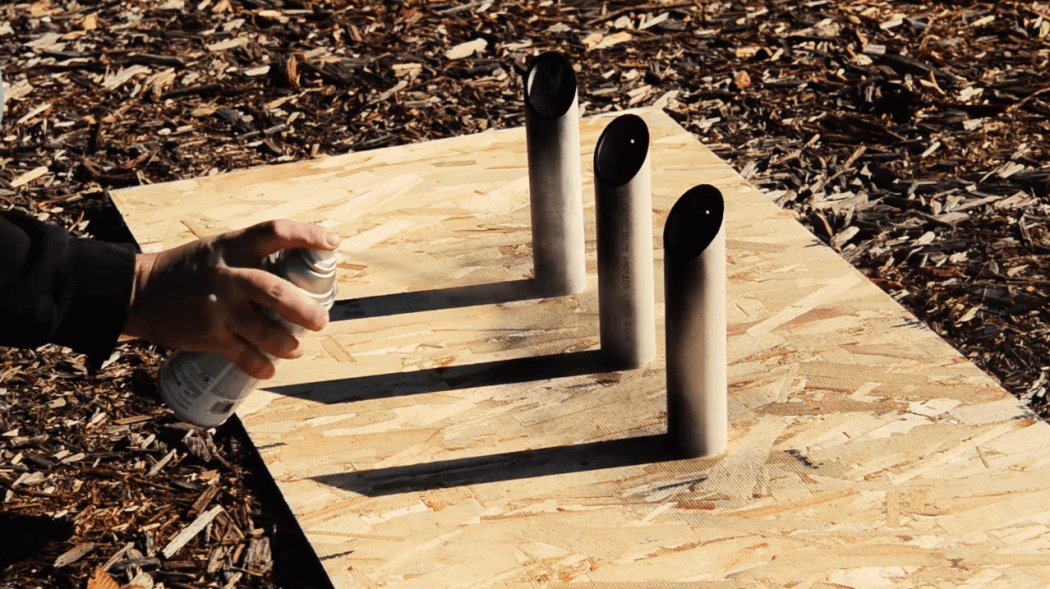
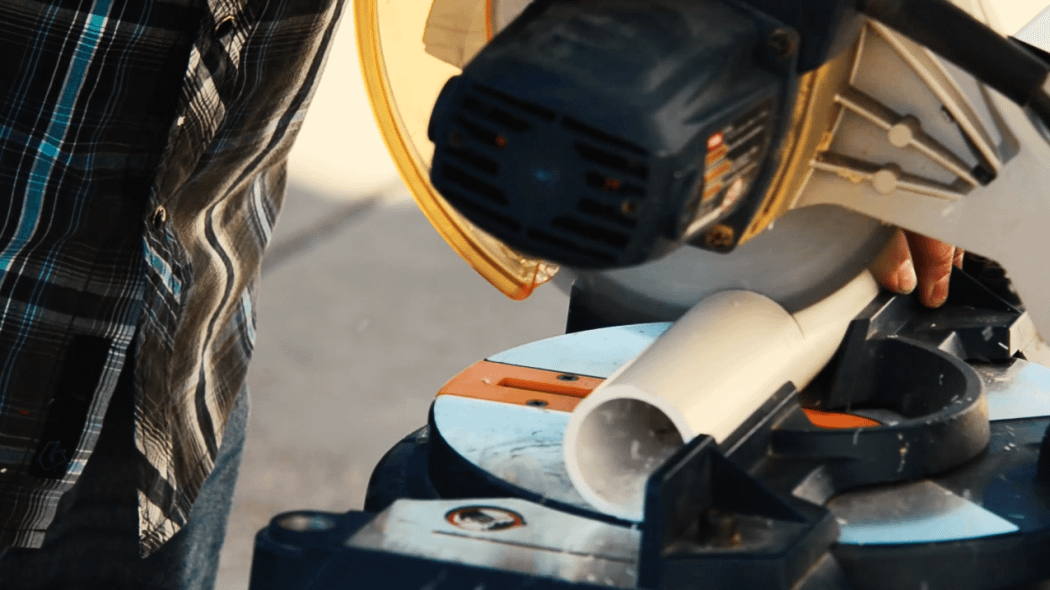
Then slice one end of the PVC pipe at a 45-degree angle to fit flush along the board. The other end of the pipe should be cut straight.
If you need to cut your board to size, do so now.
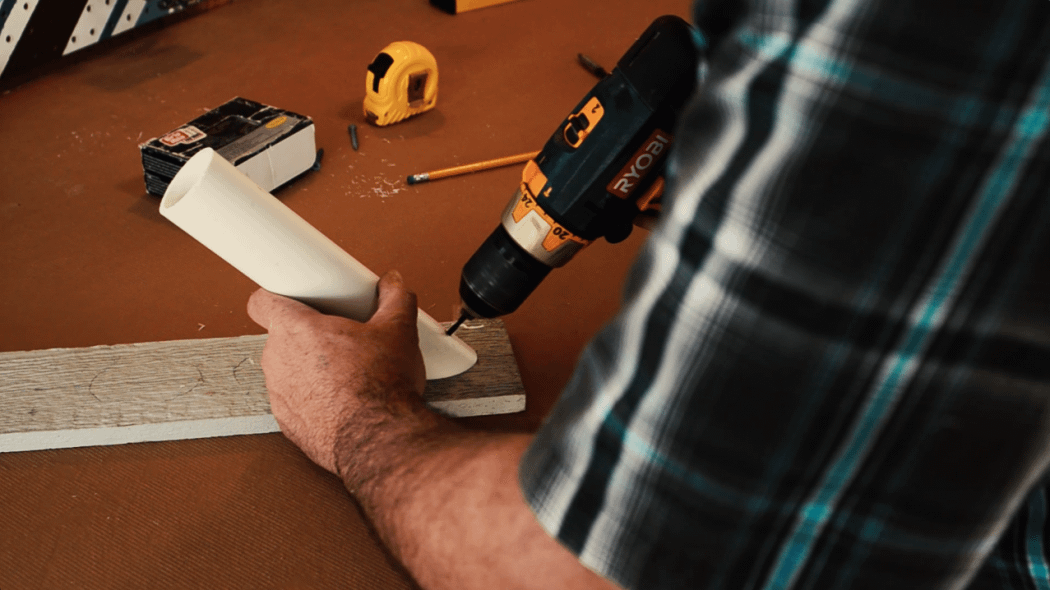
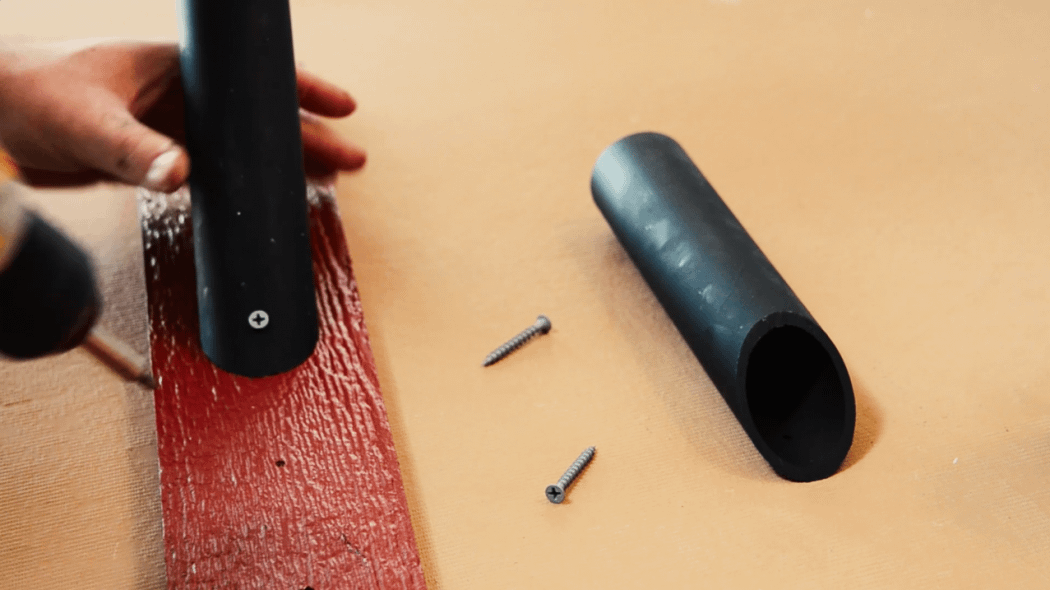
When the PVC pipe is sliced, space them out along the board and mark where each piece will sit on the board. We left 2-3 inches of space between each pipe. While the pipe is sitting on the board, predrill a hole through the pipe where it will be attached. Then remove the pipe and predrill a hole in the board where the pipe will be attached.
Now is a great time to paint the board and the PVC pipes. You certainly don’t need to paint them, but we wanted to add some color to our workspace by painting the PVC black and the board red. You can personalize this project even more by painting a pattern onto the board or pipes.
When the paint is dry, start securing the PVC pipes along the board. If you’re placing them on the board vertically, make sure you work from the top down.
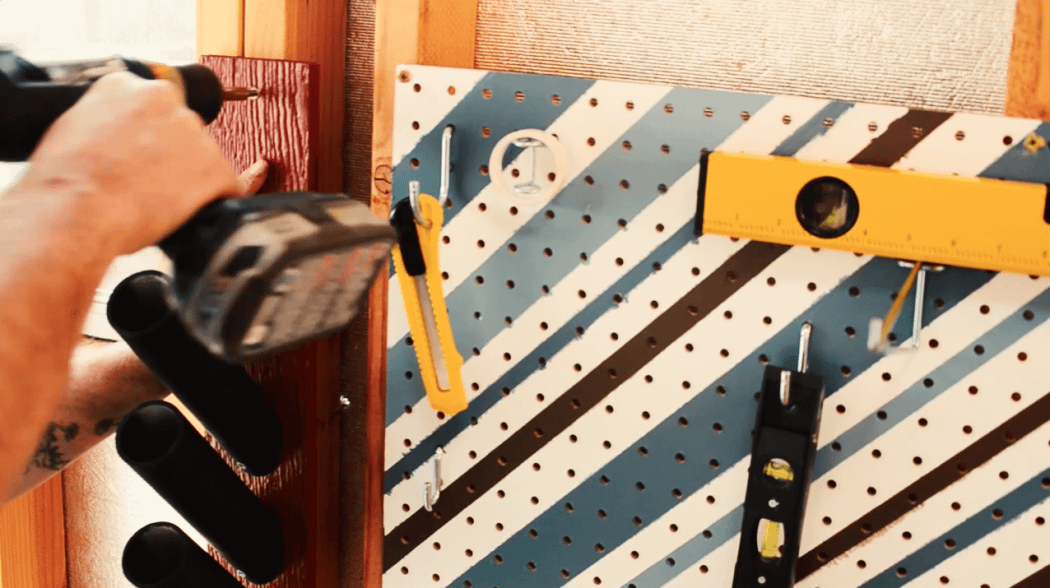
When the pipes are secure, attach the board to the wall. It’s time to clear off that workbench and get organized!
PVC Pegboard Organizer
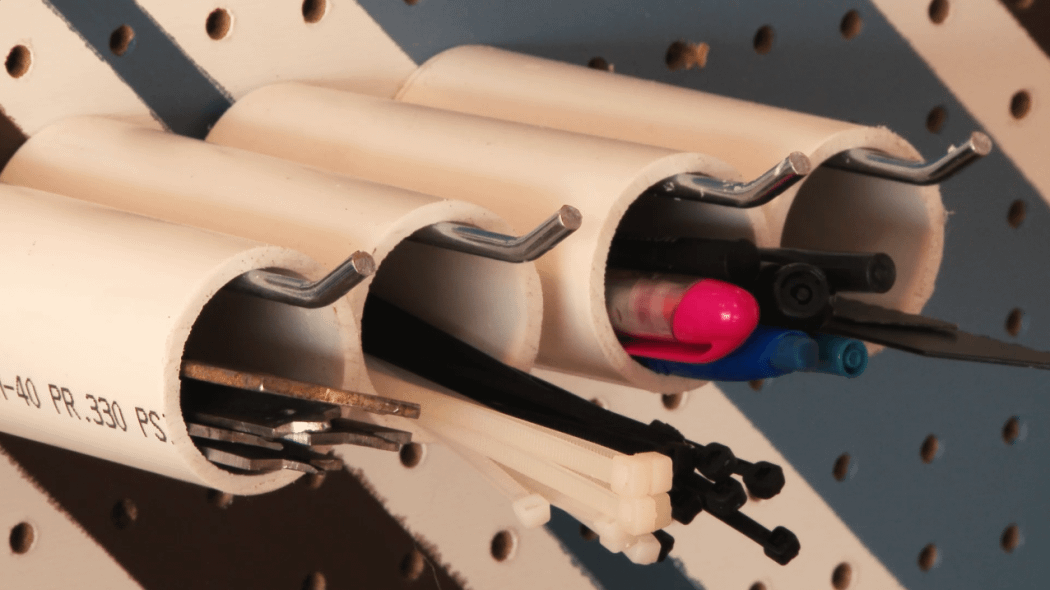
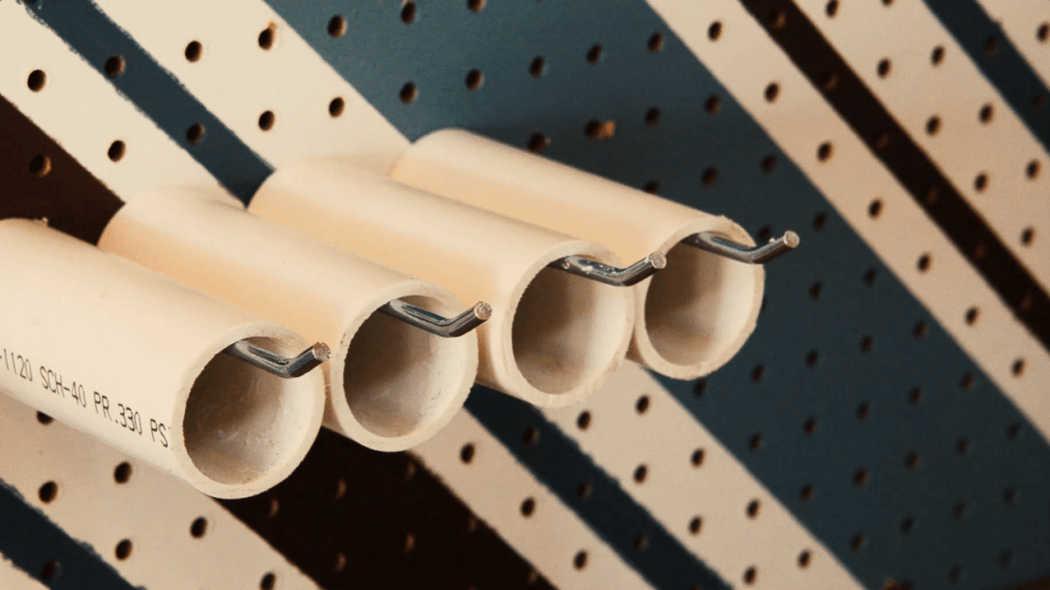
If you have some leftover pieces of PVC pipe, this is the perfect use! With a couple pegboard hooks, you’ll have a bonus organizer that keeps your stuff in place. This option is handy for keeping track of loose items like zip ties, small tools without a home, and pencils or markers. Easily personalized, this organizer can be used for a pegboard in your home or workshop.
Start by measuring the pegboard hooks and marking the PVC pipe with the length you’d like your organizers. We kept our PVC pipe a little shorter than the hook so the organizers would stay in place.
Once you have the measurements marked on your PVC, cut them to size. You can also sand down any rough edges on the PVC pipe.
Now place the hooks on your pegboard and slide the PVC pipe on!
PVC Wall Storage
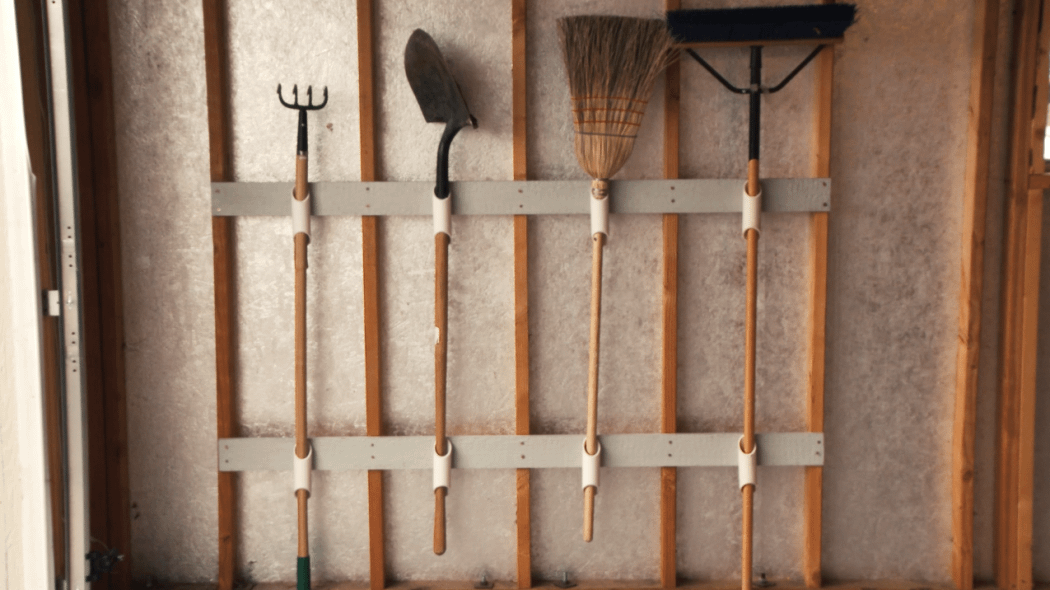
Long handled tools can be difficult to keep organized. With this wall storage solution, you’ll be able to keep your stuff in place and ready to use.
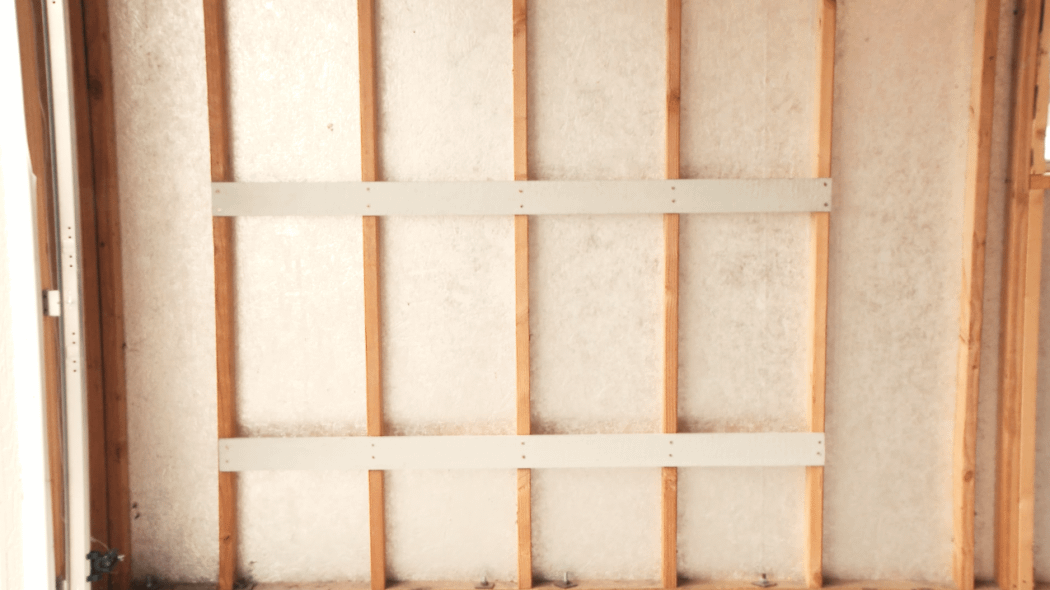
First secure the boards to your wall. You'll want to leave a foot or two open between them to make sure your tools are held in securely. Without the space between the boards you run into handles that don't stay in place.
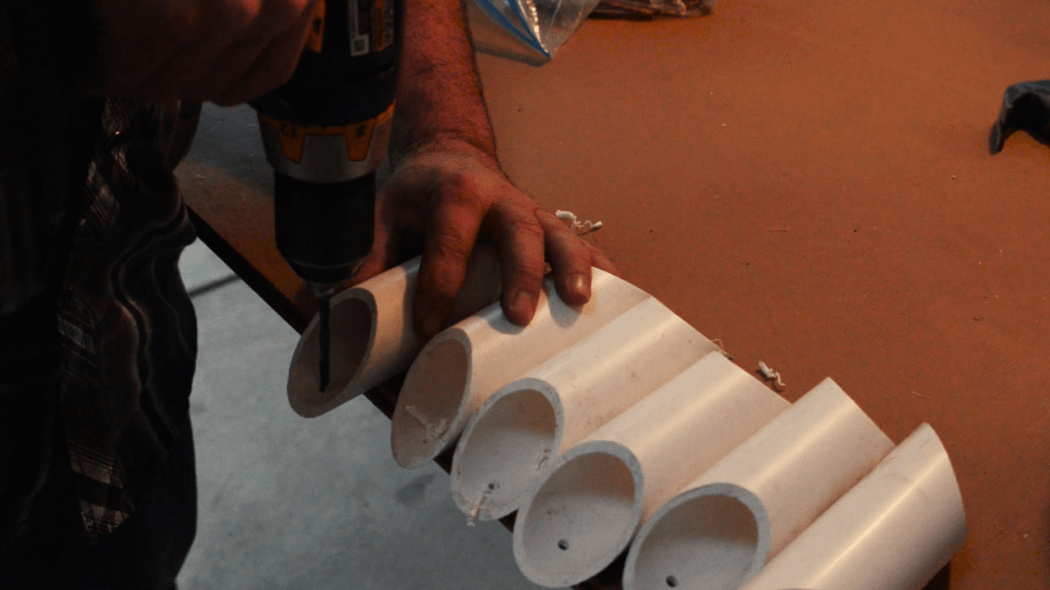
Next, measure and cut sections of PVC. They’ll need to be cut at 45 degree angles on both sides so you can attach them to the board later.
Since our pipes were a bit longer than the board, we drilled two holes in the top half of the pipe to doubly secure it to the board.
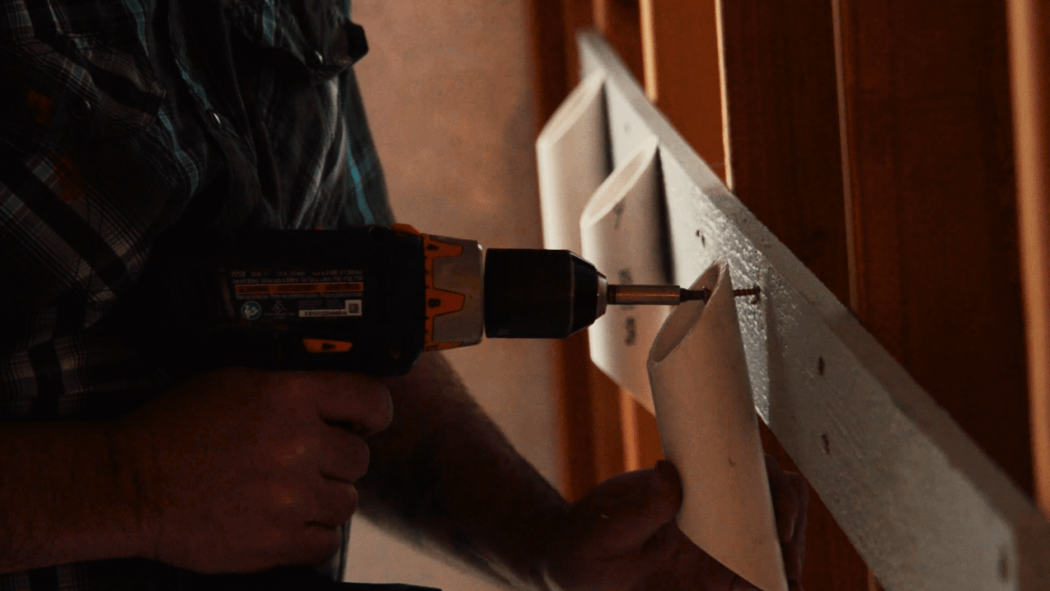
Attach the PVC pipe to the board and keep an even space in between each pipe. Then attach the remaining 4 pipes to the bottom board, underneath the pipes on the top board. Be sure that they are attached directly underneath the top pipe. Our pipe is 1 ½ in but if you have larger tools that you need to store, you can find plenty of sizes that will fit your needs.
The wall organizer is finished! Start putting away your tools and wait to see your transformed garage.
Check out our full tutorial video with step by step instructions for all three of our DIY PVC Organizers.


?imgeng=/w_3840/cmpr_50)
?imgeng=/w_3840/cmpr_50)
?imgeng=/w_3840/cmpr_50)