Type of building purchases
New buildings vs. display buildings
There are two main types of Tuff Shed® building purchases. Most purchases are new buildings, with components fabricated at our factories, then transported to the customer’s site where the building is assembled and installed. A small percentage of purchases are buildings that have been used as displays. In these cases, the fully assembled building is picked up, then transported to the customer’s site where it is delivered into place via tilt-bed trailer.
The planning process
Review your building order
This tells us how to fabricate your building, where to place items, and what colors to use for shingles and paint (if you’ve selected this upgrade).
If you purchased a display building
Display buildings are sold in “as is” condition, and can include wear and tear that ranges from minor blemishes to more significant issues such as damaged trim, missing shingles, or bent or dented floor joists. Display purchases are discounted to reflect their condition. We recommend inspecting the building first-hand to determine for yourself if the display’s condition is acceptable.
Vents
We strongly recommend adding vents to your building. Along with paint and roofing, there may be no other feature that can help your building perform better.
Insulation
If you are planning to insulate or finish the inside of your building, we need to know so that we can design the building to perform as an insulated structure.
Building permit(s)/HOA requirements
Customers need to confirm with their HOA and/or municipality for an appropriate building permits and setbacks requirements. Contact us immediately if you need help.
Installation surface
What is the correct base for the building to be installed on?
The two different types of Tuff Shed floor joists are designed to be able to be placed directly on dirt, gravel, grass, concrete or other firm, dry and level surfaces. We always recommend that customers check with their municipality to see if there are any different local requirements for the building foundation.
If I do want or need concrete, how will this affect my building?
We need to know in advance if you plan to have concrete poured. Any required permits MUST be obtained before that concrete is poured. Additionally, you will need to share the precise measurements of the concrete with Tuff Shed prior to the installation. When building on a concrete pad, it’s important that this pad is square and level. See additional concrete pad measurement guidelines below.
How do I measure a concrete pad to ensure that it is square?
Measure the length of the pad on each edge, down the middle and several spots in between
Measure the width of the pad on each edge, down the middle and several spots in between
Diagonally from corner to corner
Download
How do I check a concrete pad to ensure it is level?
Use an accurate leveling device (i.e. carpenter’s level 40″ or longer) and take readings on the pad all along the perimeter.
What is a concrete curb?
In relation to a concrete pad, a “curb” is a raised concrete area generally around the perimeter of the pad where the bottom plate of the building wall sits upon and is anchored. Some garage customers prefer this option. Consult concrete contractor to determine if this is a good option for you.
What other considerations are created by having a concrete slab with a curb?
Overhead and entry door locations need to be clearly defined in advance of the having the concrete poured. It is vital that the concrete plans match those of the Tuff Shed building plans so the concrete contractor can make curb openings in the locations corresponding with doors. Concrete with curb
Download
Leveling the building
Is your site level?
How to determine if your site is level
To accomplish this, you will need wood stakes and a string bubble level and long piece of nylon string, or a carpenter’s level and a long, straight 2×4. The string or 2×4 must be longer than the distance from the high point corner to the other three corners. Determine where the building will be placed, then drive a stake into each of the four corners and determine which of the corners appear to be the highest and the lowest points. At the high point stake place the string or 2×4 (short-edge down) on the ground and fasten it (i.e. Tie or clamp) to the high point stake. Then position the opposite end of the string or 2×4 at the low point stake. Using the string or 2×4 and the level, raise or lower the string or 2×4 at the low point stake until the level bubble floats exactly centered between the two vertical lines in the center glass vile. Now measure the distance from the ground to the bottom edge of the string or 2×4. This is the distance this first dimension is out of level. Repeat this process for the other two corners, measuring again from the high point corner, writing down your measurements. Now you can determine the distance your build site is out of level and select a method to level the site Tuff Shed®.

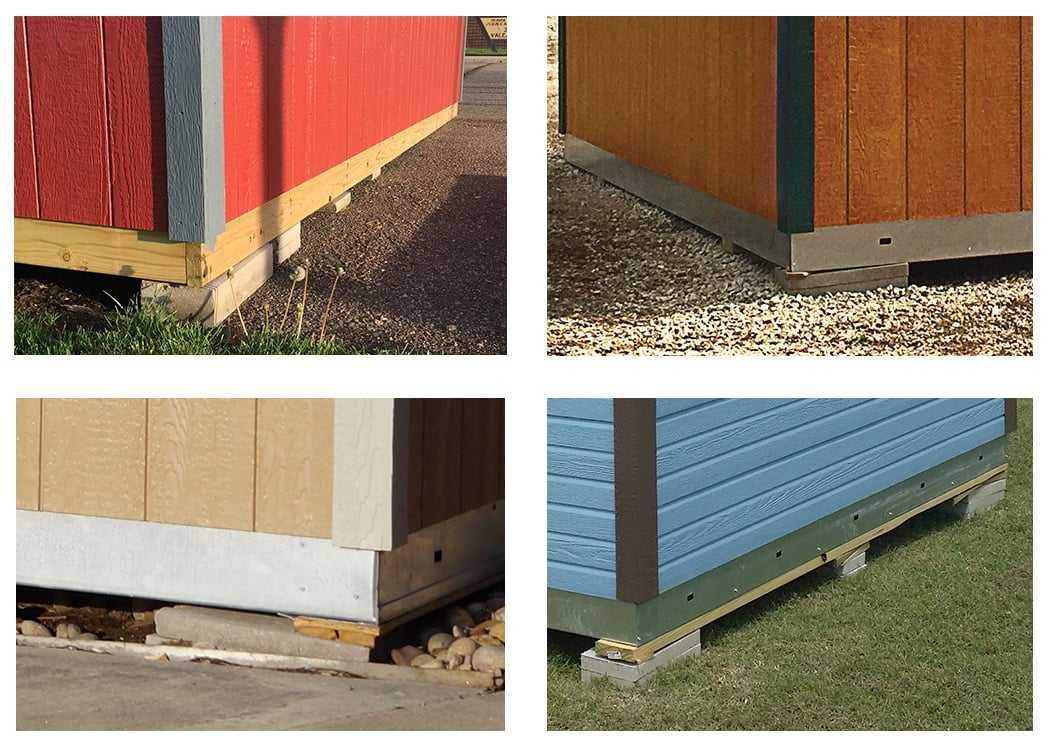
Figure 2. Examples of sheds using leveling tools
How do we level?
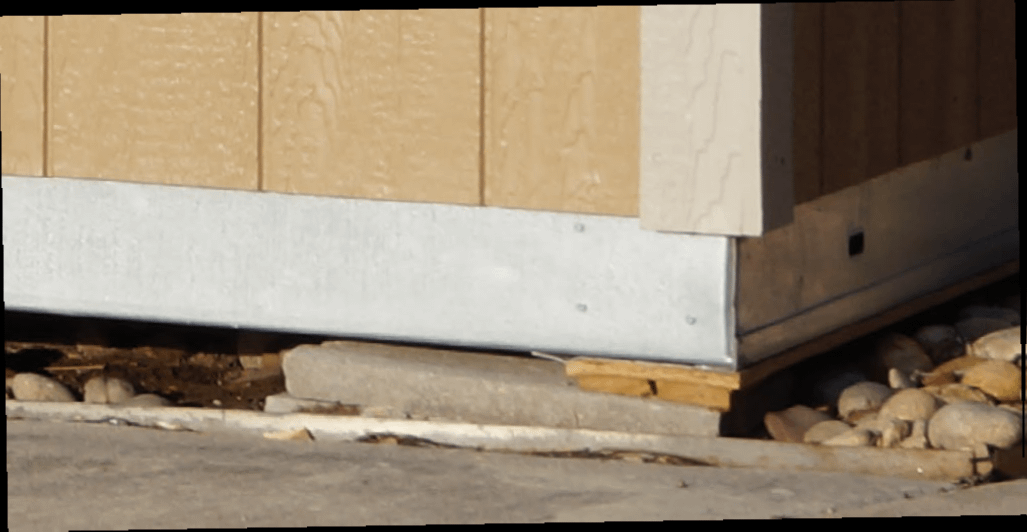
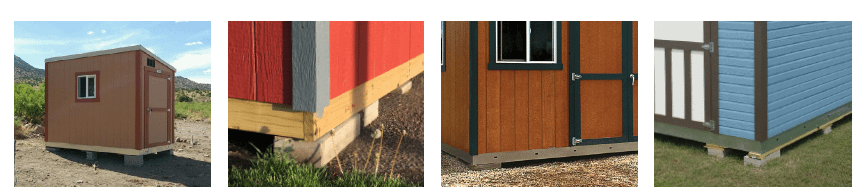
It’s important that buildings are constructed on a level site. Providing a clean and level site is the customer’s responsibility. However, for a reasonable fee, Tuff Shed® can help create a level building foundation by adding concrete blocks and wood shims beneath the structure. Tuff Shed® does NOT dig into the ground to level a building. If a small amount of leveling is necessary (up to 4”), it will be provided by Tuff Shed® at no charge.
Blocking up or “shimming” a building is not always the best solution from an appearance standpoint. Please consider the appearance and your long term satisfaction in the building when making the leveling decision. Buildings used as displays will be leveled by placing concrete blocks and wooden shims under the perimeter floor joists only. Display buildings may also include wood skids under the floor joists, which will not be removed or leveled upon delivery.


What’s the cost of leveling?
If more substantial leveling is required, the customer must choose between paying Tuff Shed® an additional fee for leveling using the concrete block and wood shim method or having the ground leveled by someone other than Tuff Shed®.
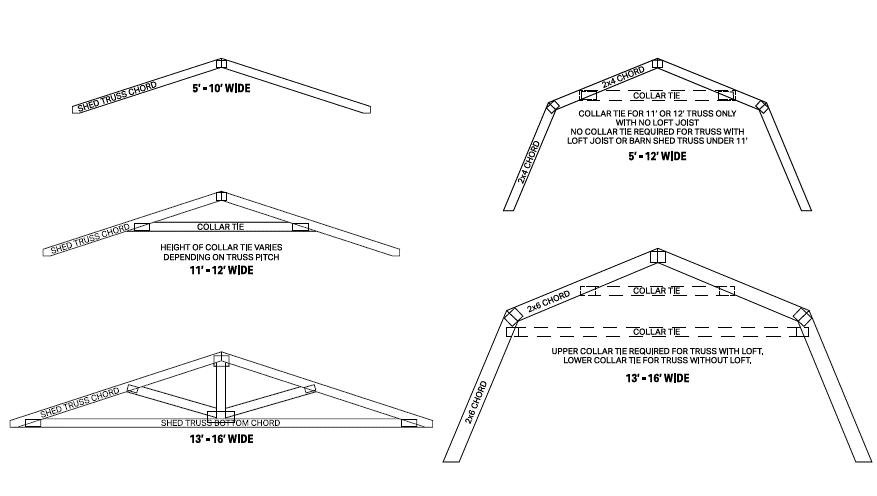
Installation day preparation
Prepare the job site
Clean the site of all debris (i.e. old tree stumps, trash, dog waste, etc) and a pathway to and from where the delivery vehicle parks.
Review access to delivery area
For new buildings, installers will need to carry building components in large sections to the assembly/installation site. If the fence gate has a top “bar”, please measure the height and width of the gate opening and provide us with this info prior to installation.
Identify and mark underground utilities
When choosing the location of the building, the customer must take into account any underground utilities that may be impacted by the delivery or installation of the building. It is the customer’s responsibility to have marked all underground utilities that will affect the delivery/installation site. Remember that these buildings and delivery trucks are heavy and that if your building was purchased with earth anchors, these anchors will be driven into the ground at a typical depth range of up to three feet deep. Many municipalities will help you locate underground electrical, natural gas, fiber optic, cable tv, and sewer. They generally will not be able to help you mark the location of sprinkler heads, underground irrigation, or septic tanks/drain fields.
For display building purchases
The building will be delivered into place via a heavy-duty truck and long, tilt-bed trailer. The truck and trailer must have a clear 12’ wide, relatively straight path from a paved road, as trailers are unable to make tight turns, similar to a boat trailer or camper. It is vitally important that there are no obstacles that cannot be navigated around, such as fences, trees, branches, playsets, or underground septic systems.
Don’t over-irrigate prior to delivery
This is especially true if your building is a display building, as our delivery vehicles are heavy, and can leave tire tracks when driving across grass or other vegetation.
Scheduling
If we haven’t scheduled already, give us a call to schedule the installation date and time range.
Pre-fabrication
For new building purchases, we will begin pre-fabricating your building several days in advance of the installation. For many installs, we begin pre-fabrication 5 business days before installation. Our outbound locations may begin manufacturing 10-12 business days before installation. At this time, we will begin placing the rough openings for items like doors, windows, and vents.
Restocking/rescheduling fee
If changes or cancellation occurs within the pre-fabrication period, a restocking/rescheduling or cancellation fee may apply. At this point, building materials have already been ordered, inventoried, and have potentially been pre-fabricated, specific to your design.
Installation day
Installers
Our installers will arrive on the site, unload materials and components, and begin to assemble your building. If you purchased a display building, our delivery driver will arrive on the site, review your desired building location, and the access route for his truck and trailer.
Age requirement
Please have someone over the age of 18 at home
Out of level sites
An out-of-level site will force our installers to stop work and collect an additional leveling fee prior to resuming.
Power sources
Our installers will need a power source so they can plug in the compressors that power their tools.
Inspect
Inspect the building before the installers leave for the day.
Weather
It may surprise you – but like most home builders, the weather seldom interferes with installation. Rain, snow, and sleet will most likely not prevent installation and will not damage the structure during installation. Ask for details.
Inspections
Inspections Checklist
Tuff Shed has created an inspections checklist. Your local factory rep will fill this form out and mark any inspections that will be required for your building.
Roof truss types
Roof trusses will vary by roof type
The type of roof truss that comes standard with your building will vary by the roof type, pitch (steepness) and building width. This is especially important on buildings starting at 12’ wide as these trusses include a bottom chord or collar tie (see diagrams below) that can impact the amount of usable space overhead. See truss examples here and contact the Tuff Shed® factory with questions.

How we paint
First coat of paint
Before being transported to the building site, the first coat of paint is applied at our factories by roller to exterior siding and trim surfaces.
Second coat of paint
The second coat of paint is applied during the on-site installation. A seasonal second coat paint discount is available in select winter markets during cold/wet months. If this discount has been applied to your order, then the installers will not apply the second coat of paint to your building during installation regardless of the weather at the time of installation.
Seasonal second coat paint discount
Customers who have received our seasonal second coat paint discount will be provided with siding and trim paint, a roller, and two small brushes. These customers should apply the second coat of paint to their building on a dry day when the temperature is higher than 35 degrees.
Display buildings
Display buildings received the first and second coats of paint prior to being put into service as a display. No additional painting will be included in the purchase.
Paint and Steel Access Doors
Whether they are standard (i.e. on a garage, PRO Studio or Pro Weekender) or added as an upgrade, Tuff Shed does not paint 3’x6’8″ steel access doors. These include manufacturer’s paint coating, and Tuff Shed only paints the door jamb of these items when the customer selects the paint option. Just as with other exterior surfaces, the customer should repaint 3’x6’8″ steel access doors every five years with high-quality exterior paint.
Appearance of materials
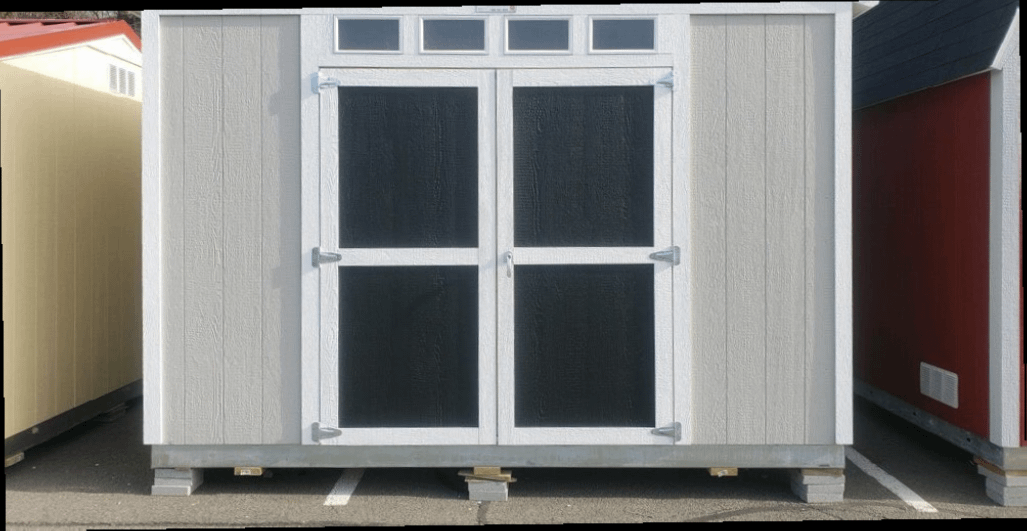
Displays
Display buildings are sold in “as is” condition, which can vary, ranging from minor blemishes like faded paint to more significant issues such as damaged trim, missing shingles, and dented or bent floor joists.
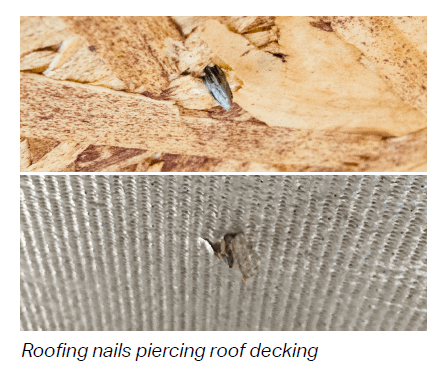
Roofing nails
It’s not a mistake that nails are poking through the roof on the inside of your building. This is necessary due to building codes requiring shingle nails to “pierce the roof decking material” and does not affect the performance of the roof.

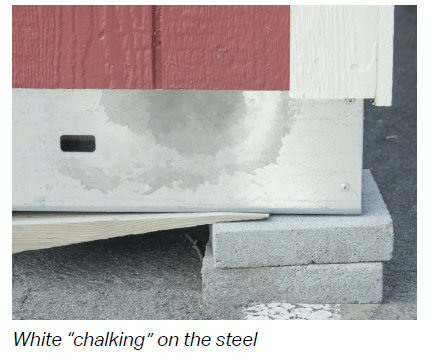
Galvanized steel floor joists
Most of our sheds include 16-gauge, hot-dipped galvanized steel floor joists, which are designed to be placed directly on any firm, level surface. White “chalking” on the steel – this appearance is normal and does not affect the performance of the steel or the 40-year industry-rating on the material.

Exposed steel
These joists are designed to withstand the elements and are exposed after installation. Some customers prefer to cover the steel with “skirting” made from the siding. While we can add skirting, we don’t recommend it, since wood siding material contacting the ground can wick up moisture into the building.
Small rectangular holes in the steel
During production, small vent holes are punched into the steel. These holes allow for airflow beneath the building. Snap-in screen vents are available as an inexpensive upgrade.
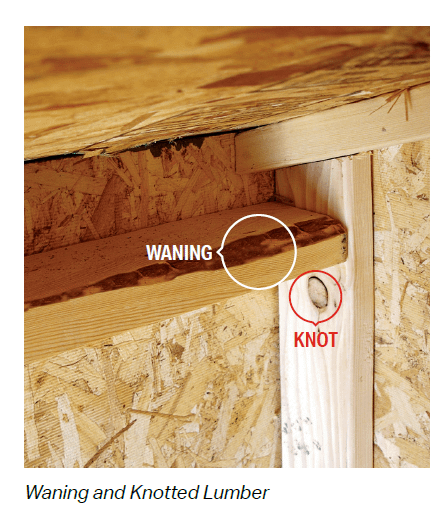
Lumber
We use dimensional lumber for wall and roof framing that has been dried, then stored in a controlled environment (our factories) prior to installation. It is unlikely that this wood will have a uniform appearance, and may have blemishes or “waning and knots”. This is normal and will not affect the structural integrity of the building.

Weathertight or airtight
We strive to make the building weathertight. But they are not airtight. Air and mice can infiltrate your building as they can your home.